 My favourite tutorial blog so far is blogmenjerit where it teaches you on how to pimp your blog. Lol nice one and i even got myself an emoticons there. Anyway, there's one post under photoshop label teaching you on how to color certain areas, or selected areas that you want. And today, I want to share with you some other ways to do that (maybe it's a bit difficult from blogmenjerit's tutorial but at least you know a few other alternative to do it). Ok, let's get started.
1) Introducing your new best-Photoshop Tools-friends, *drum rolls* the Magnetic Lasso Tool and Polygonal Lasso Tool. They're going to help you a lot in this. I personally love Polygonal Lasso Tool because even though it is hard for you to make a selected area but it's easier to handle. Magnetic Lasso Tool is more easier to make a selection because, like magnets, it will follows the selected areas that you want to make but if you didn't do it carefully, it will drag along unwanted areas. So be extra careful when using it.
 2) Make sure to zoom in closely when making selection of your image so that you won't dragging along any unwanted areas. And also, play with the Add to selection, Subtract from selection and Feather buttons (Add to selection as in to add area that you missed, Subtract from selection is to get rid of the areas that you don't want from the selected areas and Feather allows you to create a soft edge selection outline - of course you have to adjust the Pixels to create it).
 3) When you're done, you will see a dancing ants around your selected image. Lol then go to Select > Inverse. Next go to Image > Adjustments > Desaturate or Shift + Ctrl + U for shortcut and there you have it, selected color area for your image.

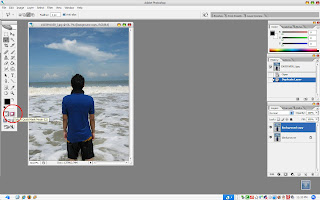
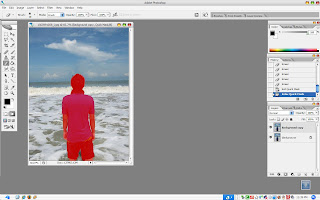
4) Another way to do this is by using Edit in Quick Mask Mode in the Tools palette. Simply click the button or just press Q then choose Brush Tool (press B), and start brushing the area that you wanted in your image (you will have red color on your image when you do that). Adjust the sizes of the brush by pressing '[' for smaller size and ']' for bigger size. Remember, Eraser Tool (press E) is very useful when you're using this method.


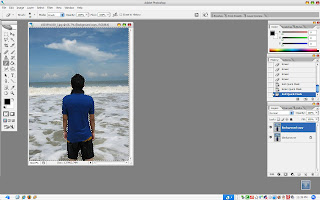
5) After you finish brushing the area that you want, press 'Q' again to Edit in Standard Mode. You will have those dancing ants again :) As usual do the Inverse thingy and Desaturate and you will have the same result! (p/s: click the image for full size to see the 'ants' hehe)

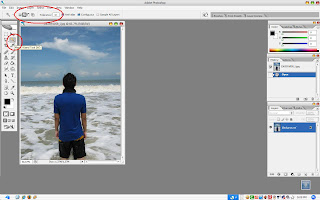
6) Besides using Magnetic/Polygonal Lasso Tool and edit in Quick Mask Mode, you can also use Magic Wand Tool (or press W). It is a good tool if you know how to use it because it's extremely easy to make selection. Just adjust the Tolerance value (0 to 255) - the higher tolerance the larger your selection. Make sure the box of the Anti-Alias is checked to define a smooth edge to the selection. Then Inverse and Desaturate and that's it!

Before
 After
After


6 comments:
care la cekgu..makaseyh..ak slaloo fail nk pki polygonal tool[apejadah tah]berkat tutot mu
ak akan mnjadi murid yg terer suatu hari nnt
yeay!!
haha
semoga berjaya!
:D
hey this actually really cool, i always wanted to know how to photoshop like that lol
boleh tak translate kok bahasa melayu? nanti boleh letak dalam blog bm, lalala... jadi contributor blog bm pun xpe ni, hikhik
lol
ok2..nnti usahakan..
(^^)v
nice
Post a Comment